Saturday 30 August 2014

Rakshabandhan

Yay! It was finally rakshabandhan. We had so much fun eating and teasing that we almost forgot taking pictures, key word being almost. :D I have been telling you guys about my cousins and here they are:


Aren't they adorable? Nope, they aren't. Don't let their smiles deceive you!! ...Who am i kidding? They are cute <3

Here's an open hut (?) due to lack of pics :D


And i am obsessed with this nail-paint color:


The day before yesterday, all of us (family) went out to a place called chokhidhani (the hut is from that place) And boy, was it beautiful? :D Here's the entrance:

Namaste!
 Apparently, no matter how comfortable your heels are, wearing them for 6 hours straight (dancing + walking + playing) will make you A LOT uncomfortable! And all of us wore heels (Oh, the horror!) :D In the end, we all ditched our footwears and ran around barefooted ;D And the food they served was d.e.l.i.c.i.o.u.s. All in all, it was so much fun.
Anyways, see ya soon. Please comment. And thanks for reading :)

Love,
Prerna.

Thursday 28 August 2014

Easy spiced up ponytail and fishtail braid

Well, apparently if you have sisters (cousins, like me) and you are the eldest of them all then it is your 'god - given duty' to doll them up whenever they ask :D (ya feel me?) Giving them make-overs, dressing them up or styling their hair :D Its like playing dress-up games, only, in real life :D 
My younger cousin always need something new! If it isn't, she will make me re-do it! :O The horror, when a half-an-hour worth labor is getting ruined by the one who asked for it! Anyways, she came to me and asked to make a ponytail, not a boring one (in her language). So here's what i did:


1. I sectioned a part of hair from the front and made a ponytail with the rest of her hair.


2. With the front portion i made a lace braid just until her ear and then continued braiding normally.

3. You can now do 2 things:

  • Wrap that hair around the hairtie and secure it with a bobby pin.
  • Or pin it below the tie, if their hair is short.


My 2nd cousin has 'outgrown' this stage but being a big sister, i just couldn't leave her be. So a fishtail braid for her :D Truth to be told, I practically forced her to let me do her hair :D It was a really funny scene, me holding her by her hair ;D


Even though they can be a pain-in-the-a** but they are the ones who will make your life all the more interesting :D And without their nagging you would feel lonely :D
I hope you liked this post :)
And thank you for reading it :)

Love,
Prerna.

Monday 25 August 2014

top 10 great finds!

If you have read my blog, then you must know that i consider myself a shopping addict. I don't necessarily 'splurge' on things i don't need, but i do buy things i don't need (-_-;) I am an impulse buyer. If i like something, chances are i will buy it. If not, then the 'memories' of that piece/item will 'haunt' me (-_-;) You feel me? I am not gonna lie, but when i read stories about girls/women like me, i feel reassured (Sorry!) that i can someday get over it! I am the only one in the family who is like 'this' so its nice to have companions, who understands how i feel. (~.~) White internet browsing, i found some really great clothing items/accessories/footwears that i instantly fell in love with.

1. These lace-up high heel shoes.

I want them all!
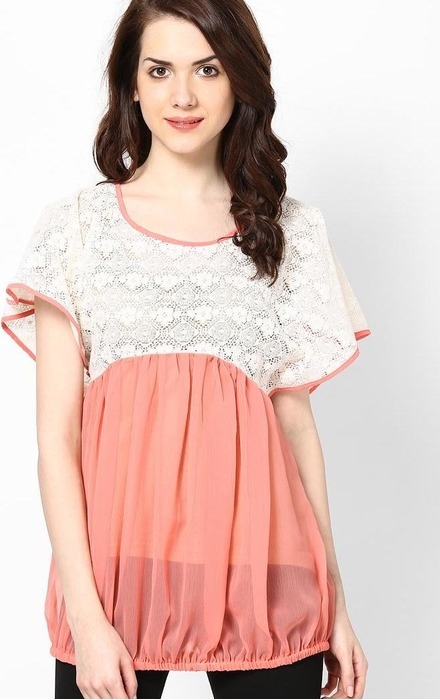
2. This lavender knit tunic and that hat :D


3. Maroon + polka-dot, anyone?


4. I love pull-over and studs! Combination of these 2, even better :D

5. If you wanna try wearing crop-tops, start with these.


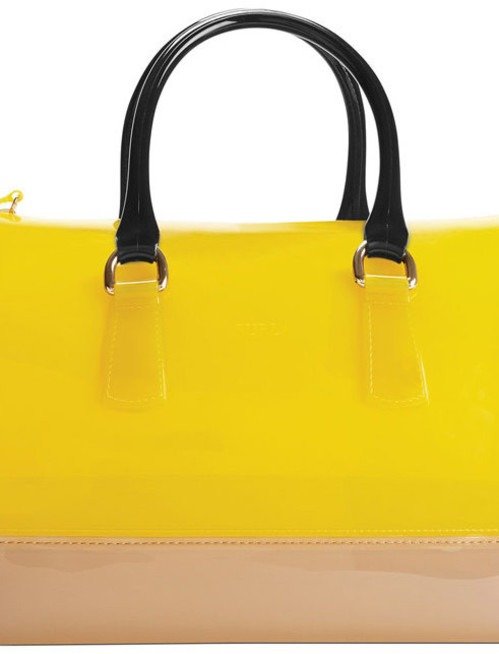
6. Found this bag, loved it, saw the price and cried silently T_T


7. I can't stress enough on how much i love this dress!!! 


8. I want want want these sunglasses!!


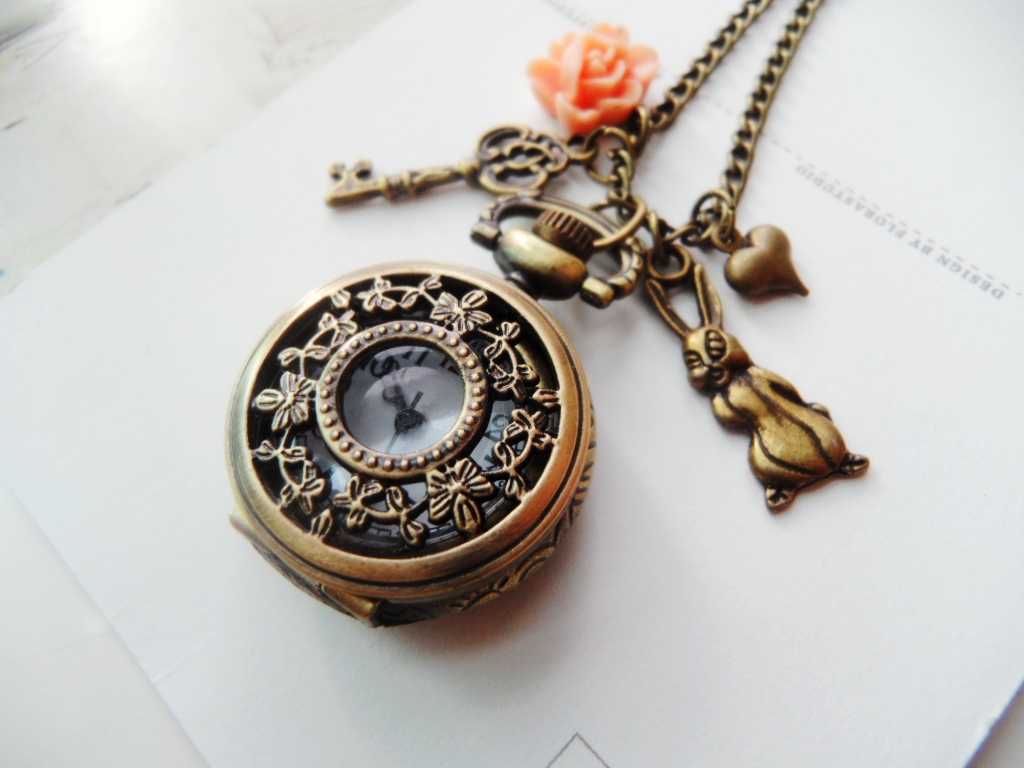
9. Nope, i have never kept a pocket watch but these? I would love to ;D


10. Last, but not the least, this flowery hair-clip :D


This list includes the top 10 things that i find really cute and love-able. (saying that to accessories and the likes? Weird?) If i could, i would like to have'em all. Since i can't, i have to remain satisfied with mentally squealing over them! :D Anything you like? on this list as well as apart from it? Comment below if you do :D
Thanks, as always, for reading :) Hope you liked it :D

Love,
Prerna.

Sunday 24 August 2014

Missed ya'all

Hola guys! I'm back :D And nope, i wasn't on any vacation. Where was I? Apparently if you miss too much 'college' work (meaning being absent for a week without notice), your professor is gonna call every single member of your family (whose number they have) but not you. And your family is gonna be so pissed that they will take away your T.V., Cell-phone and Internet privileges ;( And your college is gonna be so pissed that they will give you no time to miss your extra privileges, aka, T.V., cellphone and internet T^T Lesson learnt, the hard way (-_-;)
Even if i was negligent but that was way too cruel T_T I had extra lessons almost everyday and was given a lot of assignments -_- But now that's over, i am back :D Yay, it feels so good to be able to write here again :)
This past week wasn't all bad you know, I went shopping :D It felt so good :D Actually, we, Indians, have a 'Rakshabandhan' celebration where a sister ties a string on her brother's wrist. And the brother promises to protect his sister in return. It is an auspicious event, even though i am unable to express it, believe me it is. In a way, it is a sister's day :D We, sisters, get to do whatever we want (in theory :P) But the most important part of this celebration is the gifts <3 Don't ya'all just love gifts? :D The string we tie on our brother's wrist is called a 'rakhi'. 'Rakshabandhan' actually means 'to protect a relation', beautiful meaning, right? :)
Anyways, this was all for today's post, i will try to be more regular from tomorrow onward. Please keep reading my blog :) And leave a comment if you find something you like, please (Whoa, i made the face Rumplestiltskin makes when asking a favor from the Evil queen :D)

Love,
Prerna.

Thursday 14 August 2014

DIY skirt (super easy) from a kurti

I have this beautiful kurti (Indian clothing) It is the most beautiful green i have seen (*-*) My relative (sister really) gave it to me. We were really close before she got married.


Just look at the detailing on the top portion of this kurti <3 so intricate.


Even though the detailing of this kurti is really nice but there is a lot i don't like in it. I didn't like the crinkled look it has, for one. The detailing on the top part is really nice but it looks droopy over my shoulder and 'heavy'. I thought about cutting the shoulders a bit, to make it fit me, but the detailing was all over my shoulder. So it wouldn't work. (._.;) That's the problem with my frame, even though things might look good at first but they don't look so good on me. -_- That's what you get for being small, but there are more pros than cons in having a petite frame :D I might make a post about this, but for now, lets concentrate here. I wanted to make it wearable, and skirt seemed like the most 'appropriate' option because there were a lot of darts (at the bottom) to make it flowy.

Steps:

1. The first step was to cut it to an appropriate length. For that, i just held it infront of my body and placed it accordingly. I also added 1" for waistband and 1" for hemming.

2. As much as i love the brown-ish velvet-y lace at the bottom of the kurti, it just wouldn't work in the skirt. So i used a seam ripper and removed it.

3. I ironed it to 'remove' the crinkling it had. (It took a lot of effort to make it smooth)

4. I hemmed the bottom.

5. I measured my waist using elastic (so as to know how snug i want it to be). Add an inch and sew the ends together.

6. I placed my elastic band over the skirt's top and fold it over. And then, i started sewing around the edges. Don't sew over the elastic.

And this is how my new skirt looked. I have never been a skirt's person. :D But i want to start wearing them. :)


Nice, isn't it?
I hope you liked it. :)
Thanks for reading and please leave a comment :)

Love,
Prerna

Tuesday 12 August 2014

Refashioning a shirt (easy)

This is the most easiest way to refashion the shirts you 'steal' from your brother (Muahahaha <- was supposed to be an evil laugh) and also to refashion your own shirt :D

Items needed:

1. A shirt.
2. Scissors.
3. Sewing machine.
4. Thread.

And that's just it :D Lets get on to it now, shall we.

Steps:

1. Cut out those sleeves as close to the seam as possible. (you will be needing those sleeves later)

2. Sew the shirt so that it fits you. - A completely optional step but must to do when the shirt is quite big on you.

3. Cut the upper part of the shirt. (Depends on how long you want the shirt to be and where you want it to start etc.) Leave 1" for hemming. Fold it twice (0.5") and sew it.

4. Make 2 tubes of equal size (mine had a width of 1.3" approx.) from your sleeves. These will be your straps. And sew them on place.

And ta-daa a completely new top/blouse out of an old shirt :D

Here's some pictures of how they turned out.

I just wore it, hence the wrinkles.

I cut it so that the button was on the top.

To be honest, i didn't quite like this shirt. (I am talking about the shirt, not the refashioned top.) The top, i like.
It is quite an old project and i was just experimenting around, hence, i chose this shirt. But now it has become one of my favorite DIY's because of how easy it is :D And they can be a made as a baby dress too :D
I hope you liked it :)
Thanks for reading and please leave a comment :)

Love,
Prerna.

DIY inspiration :D

I have made a list of things i want to make, preferably before this year ends :D I just want to 'better' my skills and its nice to have a list because when i think of making something, i forget what i have thought (-_-;) Why does a brain starts overflowing with ideas when we are about to sleep? Geez brain, help me when i need you (o_o)
Well anyways, the list is like this. (None of these pictures are mine, i just wanted to have a picture of my inspiration to the particular item.)

  • A flower crown : Nope, i have never worn a flower crown, ever. I don't know how i should wear it but i love how it looks (on other people, ofcourse) :D Really very spring-y :) So i'm thinking about making one! And it is on the top of my list.

I found it on net and want to make a really colorful one, like this.
  • A denim purse/clutch/bag : I found many tutorials for this. I have lots of scrap denim, left-over from converting jeans into shorts and i would love to use it somewhere. :D I don't know how it would turn out but i have found how i would like it to turn out :)

Something like this.
  • An envelope messenger bag : I really dig envelope bags :D I first watched a tutorial on how to make purses and really fell in love with the end product (turns out it was an envelope messenger bag). I haven't gotten a chance to make one yet. But i would like to get on with it, as soon as possible!
  • Boots (sorta) like footwear : I was browsing around on instructables once and found this really great boots (sorta) tutorial. Turns out, it wasn't an actual tutorial, just a picture of the finished product. I actually don't have many boots (just one) So i would like to make another :D Yay! more boots <3 And well i couldn't find that tutorial again, so i can't show you guys how it looked ~.~ But once i make it (hopefully), you guys can see :D

  • A sailor dress : I love love love love sailor dresses <3 (Apparently, anime/manga have a huge impact on my decisions. 'Sailor moon' made me love such dresses.) And i would like to make one as well (hopefully). There are many variations in such type of dresses but i have found the 'one' for me (*-*) It looks a bit difficult to make so maybe i will put it off for now or maybe not.
Isn't this dress just adorable (*-*)
  • A circle skirt : I love the way these skirts 'flows' :) They look super comfy and super feminine. I am more of a shorts type girl, so i would like to give them try :D I have made shorts and i think they are super easy to sew but i don't know about these skirts. So lets see how they turn out :)

  • Espadrilles : I have some reasons for making them: one- they seem easy to make (maybe) . And i hope they are because i want to make lots of them <3 They go with almost everything! Be it dress, shorts, skirts etc.!

These 2 are my favorite <3
  • A chunky necklace/bracelet : I just want to make one! And that's the only reason :D
  • Dye : I want to take a dyeing project as well. They are the super easiest way to refashion almost anything! So yeah, it makes it to my list (^_^)

  • A sash : I know they are quite easy to make but i haven't made one yet and i want to and thus, they are here, on this list.
And that concludes my list, for now. I hope i can complete the things i mentioned here. Though, its quite hard for me to stay on a plan because i 'deviate', a lot (._.) Not proud of it, but thats how i am. So, wish me luck :D What is it that you would like to make? Or not make from this list? Hope you liked it.

Thanks for reading and please leave a comment :)

Love,
Prerna

Friday 8 August 2014

DIY shoes

Hey guys! How ya doing? I have been pretty sick these days (damn you rain >.<) But i've been productive :D I just refashioned an old pair of sandals and I love love love 'em <3

There's my baby <3
So here's the list of materials i used:

1. An old pair of shoes.
2. Ribbons - 2 m.
3. Hot glue
4. Scissors.
5. Thread and needle (optional)

I actually bought 2 colors of ribbon to try and see which would look better- the first one was maroon and 2nd was blue. I chose blue, reason? Because i don't have any blue footwear :D And i'm so glad i did. It looks pretty, the sandals i mean :) Let's get to it then.

Steps:

1. Take your old sandals that you don't like anymore, maybe because their strips dug into your flesh, leaving marks. Argh..
As you can see, they have many strips, so lets give them names. 
  • Front will be front strips.
  • Those 2 little strips that goes to the front- little strips.
  • The last, those connected to the elastics- back strips.
Yes, I'm that bad at naming but it will do, i hope :D

Don't mind those holes. Its a result of my trying to see how hard it was to punch through it. I know, that was stupid so lets not mind it :D
 
2. Cut out 2 pieces out of your ribbon that covers the front part and add 3" to it so that you can easily glue it to the sole of your sandals.


3. Hot glue it.

They look better already :D Except some more.. strips!


 4. Cut your ribbon and glue it to the back strips. Also add some inches accordingly so as to you can cover those strips properly.


5. For one of those little strips- cut a piece equal to the length of the strip plus a little extra inches (you know the reason) And cut that in half, width-wise. And hot glue.


6. 2 blue strips? Too much So cut out the other strip!


7. In this step, i just cut out those elastics which are at the back. Sorry, no picture.

8. Cut a piece of ribbon which goes from the back strip (both) and can be tied at the back/side/front, anywhere basically. And hot glue it on place, where it sits comfortably. I sewed it as well to make it more secure.

Mine was long enough to be tied at the back.


9. This is an optional step. I made bows to cover those stitches, nothing too fancy. And as always, hot glued it. You can use buttons/flower instead.

I love bows so its a given  :D

I'm so happy with the end results <3 They are super comfortable.
The best thing about DIY's that you get to choose the color, shape etc. They takes some time, well, maybe, quite a lot but they are worth it! To be honest, when i started this project, i had nothing on my mind. I made it as i went on. It was fun. :) I hope you get your share of fun :)

Thanks for reading and please leave a comment :)

Love,
Prerna.

Thursday 7 August 2014

When i lost my dream..

Dreams are the nicest thing in a person's life, i believe. They are the sole reason people move on; to fulfill their dream. People say destiny makes us do things, but i say its our dream which fuels our journey. As i child, my dream was to go on a world tour with my mum and buy all the things she desires. Pretty stupid if i say so myself! But this dream is the reason why i'm here. After her death, I lost that dream. I had nothing to follow and so i was stuck doing 'nothing'. Nothing was interesting. It was like i had nothing, as if my life was just passing by with me doing 'nothing'. I know i'm using the word 'nothing' a lot but that word exactly describes how i felt. I read somewhere, "Don't tie your dreams to people" and i did but i don't/won't regret it. It was precious to me. It was my motivation to go on for so many years.
I believe every person had felt 'nothing' atleast once and to be honest, it is the worst period of your life. For me it was. I don't know how you people dealt with it but for me it consisted of 4 stages:

  1. In the first stage, all i did was sleep and eat. And that's it. I stopped going outside, never meeting anyone, never even smiling (I am a smile-y person, mind you). I even skipped college. I was cut-off from everything and everyone. Period. I stopped caring about anything altogether. Even when my family approached me for this matter, i reacted harshly. I wouldn't accept that there was something wrong with me.
  2. The next stage was me accepting i lost my hope, aspirations along with my dreams. Maybe you will think its exaggeration. I don't know what it was, but combining it with losing mum, it was awful. I started goofing around. It wasn't forced but it wasn't me either, as if i was empty inside. It was like i was looking at someone else. In this stage, i actually started to think nothing mattered. Nothing matters is different than not caring. Personally, I think it is the worst of all the stages.
  3. Then, i thought about 'finding' a dream so as to not feel 'empty'. It was a stupid thought. No-one finds a dream (-_-) Dreams come to you suddenly. Looking back, now i know it was stupid but hey, i was desperate. I tried so many different things. Multimedia, poems, drawing, even studying for God's sake. I was that desperate.
  4. I found something. It started small but ignited a spark within me. I don't know where my destiny lies but i do know my dreams now. And this is the fourth stage.
I love to sew. There, i said it. You may think 'What the hell' or 'That's so plain'. But it makes me happy. I can't imagine myself not sewing or making something. And this is what i want to keep doing.
As Dr. APJ Abdul Kalam said, "Dream is not that you see in sleep, dream is which does not let you sleep."
So, find something that doesn't let you 'sleep'. By that, i mean, find something for which you want to work hard and that is your dream. My dreams make me who i am. I want to make my own boutique which is appreciated by people. I will do whatever it takes to do so! I will keep getting better. To track my work progress, i am keeping a blog. Its fun. I am enjoying myself :)
Thanks for reading :)

Love,
Prerna.

P.S.: If you want to look at my other blog, well here's the link: http://trieddiy.blogspot.in/

Monday 4 August 2014

OOTD/OORD (2)

Whoa, 2nd OOTD, i'm shocked. Can they be called OOTD's even when i'm posting these outfits so far apart? If not, then what are they called? ~.~ I'm confused! So let's call them OORD (Outfit of a random day :D)

Well anyways this was my complete outfit :)


I wore a dark pink colored shirt with a dark wash jeans and a black knit cardigan. As always, my love for bows make me do things i would never think of doing and hence the bow-tie (sort of).

1. Bow: To be honest i use this bow with everything, not because i don't have other bows. Simply, because i play it safe. Black is a neutral color and hey, it matches with my outfit, so its a win-win situation :D And i must warn you, this bow is gonna make a lot of appearances!


The one and only, Mr. bow.
2. Knit cardigan: To be honest i don't have many of these (just 4) but if i had to choose, this one would be my favorite. And like the above bow, it goes with anything (okay, maybe i'm exaggerating) but you get the point.
I am a disastrous shopper. Give me money to buy something/anything, trust me, i will spend it on clothes (which i later regret). And this piece of article was a product of one such time and I absolutely really love it.


3. Shirt: This shirt was a night-mare when i bought it -_- It was creamy colored and had brownish patches everywhere. Even after dry cleaning they wouldn't go and i was too lazy to return it so i did the one thing possible, dyeing. I won't say i'm super happy with the results but i guess its okay. I might re-dye it again but for now i am going to enjoy wearing it like this only.


I knot it looks disastrous in the pic but in reality it isn't.
4. Dark-was jeans: Everyone NEEDS a dark wash jeans that fit them like a glove. It can be either high rise, low rise or mid-rise. But its a must! I generally wear low-rise jeans.


These pocket are amazing, right? <3
5. Shoes: I call every foot-wear, shoes :3 I know their names but calling them shoes feels.. just right. :D So, i wore this pair of wedges with my outfit.


As i have mentioned in a previous post that i can't wear makeup (sensitive skin). So I just used an eye-lash curler (amazing stuff) and kajal (upper lid) for my eyes. As for my lips, i used a light pink-ish colored gloss. And i was good to go. :D
Don't you just love the bow?!
Thanks for reading and I hope you liked it. Please leave a comment :)

Love,
Prerna.

Livening up a ponytail (easy)

Ponytail is the easiest way to do your hair. But they can be a bit boring if its the same everyday (My problem exactly :D) So i always try to liven them up.
My sister is the model here. You have no idea how scary my sister(s) are T^T  They will ruin a hairdo that took a lot of hard work, just to spite you T^T But don't worry this really is as easy as it looks :D

Items needed:

1. Comb.
2. Hair ties (preferably thin)
3. Pins.

Steps:

1. First of all i divided her hair into 4 sections:
  • Front part for pouf.
  • 2 side parts
  • Back part for ponytail.
2. I firstly made that pouf and secured them using pins.
3. Then, i made a ponytail with the back sectioned part and secured it with a hair-tie.
4. Then i took the left side part and twisted it over the hair-tie and secured it with a bobby pin. Same with the right side part.
5. Use hair-spray so that your hair-style holds properly. This step is completely optional. I use hair-sprays only when an intricate detailing is involved in a hair-do, so that it doesn't get messy.


Her hair is really short, but i think it looks cute <3 In most of this 'hiding your hair-tie with hair' hair-dos people generally use one part of hair but i think using 2 parts and crossing them looks better. Maybe, that's just me?
Anyhoo, t really is raining hard these days. People find such weather, romantic. But, I, on the other hand, think its depressing. When it rains hard, all i want to do is sleep or eat or watch tv even if i have to skip college. So basically i get lazy :D Woo-hoo lets call rainy days, lazy days :D But i really love how green everything looks after it had rained and the smell of earth when its about to rain. ^_^ What about you guys? You love rain? Or are like me?

Anyways, I hope you liked it. thank you for reading, i appreciate it. Helpful criticism are much needed so please do comment :)

Love,
Prerna.

Friday 1 August 2014

Easy spring nail arts (even for short nails)

I have seen many dotted nails and this below is my favorite that I've done so far. They are super cute. :D 
So here they are:

1. The first one i made using glittery clear nail paint as my base and then used a toothpick to make those dots. The most difficult part of this nail art was to choose the colors :D So yeah its pretty easy. Just use 3-4 nail colors and put the dots wherever you want, as simple as that. You don't have to have any knowledge about nail art to have it on your nails, its very simple. The color used were pink, red and green. To be honest any colors can be used. :)

on short nails.

2. I used white nail color as my base. And pink, red, blue and green for those dots. Here also i used toothpick to make those dots. (I'm pretty stingy if i can save, so yeah i don't have a dotting tool :P) The most difficult part here was to wait for the base to dry. I used 2 coats of white to make it completely opaque and had to wait in between to let it completely dry, otherwise, i would have ended up with a really clumpy looking base (-_-') which i'm sure wouldn't have looked good. :D


Painting within lines is so mainstream :P
I think both of them looks pretty neat and very different. Just by changing the base color, the whole look can be changed :D You can use a top coat so that it doesn't chip easily. But i didn't use it because i like the textured look it gives without using the top coat. But its completely a matter of preference :)

I hope you liked them. Please leave a comment :)
Thanks for reading :)

P.S.: I made a tutorial on chevron nail art here: http://luckystar5.blogspot.in/2014/08/diy-chevron-nails-easy.html

Love,
Prerna.

DIY chevron nails (easy)

Lets directly get to the nail art without me rambling on and on about things which aren't that interesting but i refuse to believe so.. Damnit, i'm doing it again. Don't mind it. And just read below:
Items needed:

1. 2 nail paint colors-
  • for base coat, i used a really beautiful teal color.
  • for chevron, i used black color.
2. Toothpick or a dotting tool and a brush.
3. Top-coat (optional)
Steps:

1. Apply your base-coat. If you want a more opaque look than apply 2-3 coats, otherwise 1 coat is just fine. 


2. Use a dotting tool/tooth-pick to create dots (3 lines of dot), which should be small.
You can stop here if you want. But i was going for chevron nails so i continued.

3. Again using a toothpick/brush join the mid dots in an inverted v shape.

4. Extend lines from those dots to the side of your nail to make chevron pattern.

Use a top coat if you want. In this particular nail-art i did used a top coat.
And that's all you have to do to have these completely amazing nails.


These nails surely scored me many compliments :D
That's it then. I hope you liked them and comment if you think so too. :D
Thanks for reading :)

Love,
Prerna.